|
Determined not to give up on creating a successful gum bichromate print, I began researching ways to create a digital version instead. I did this for two reasons; 1. I did not have the resources to create another physical print after my first unsuccessful test. 2. Others who may want to create their own gum bichromate may not have the resources or know how to. Upon searching for an online tutorial on how to create a digital version on both Youtube and Google, I realised it may be harder than I initially realised. Everywhere I looked, I was just finding tutorials on how to create the physical print, rather than an online edit. When looking at my previous work from years ago, I found that I had made an digital edit of the gum, but I used a pre-set provided by my tutor. Therefore, I began searching for pre-sets online, which also proved very difficult. Often you would have to pay, create an account, or have branding over your image, which I did not want to do any of this. Instead, I tested my Photoshop knowledge to create my own process of a gum bichromate edit. As a reference image, I chose this image which I feel best represented a successful gum print. This is due to the authentic paint brush strokes around the borders of the image, the subtle glow/haze, and the sepia, desaturated tone. 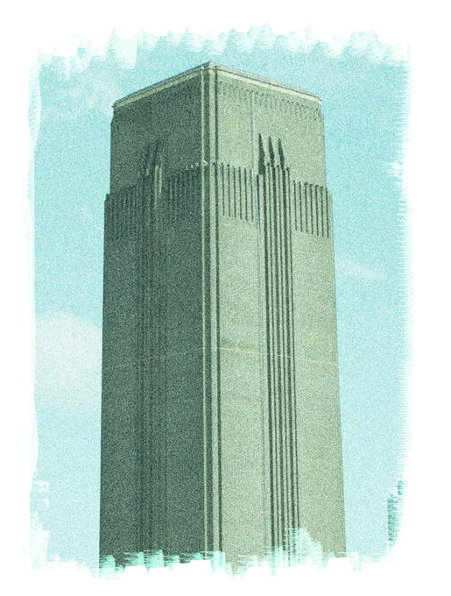 I began by opening the original image that I used for my physical version on Photoshop, and duplicating the layer so I still have the original photo underneath my edits. I then adjusted the curves of the image to fix the exposure of the image, bringing back in some shadows and clouds. I then went into adjustments>photo filter, and selected sepia. I then went back into my curves and adjusted them again to maintain good exposure and detail. I then went into filter>noise>add noise, where this added some grain and haze to the image. I was able to adjust the amount to what worked best. I then went back into filter and selected stylize>diffuse. This gave me the option to haze and fade out my image further. I was able to select which mode worked best for my image which seemed to be Lighten Only. Going back into my curves again, I ensured details of my image were still visible. As I wanted to create paint brush style strokes around the border of the image to make it look more realistic as a gum bichromate print, I then moved onto that. This step was very simple but made all the difference. I selected the paint brush tool with white and chose the brush style in smoothing of 174. This was the most authentic looking paint brush tool. I then used a 100% opacity to erase the edges of the image. Lowering the opacity to 50%, I then blended out the harsh lines to make it appear more realistic. After one last adjustment to my curves, my edit was complete. The process took me around 15 minutes to get my head around. Here is the end result:
0 Comments
|


