To gain a better understanding of the meaning of Studium and Punctum and the difference between them, I read some information from Roland Barthes book Camera Lucida. 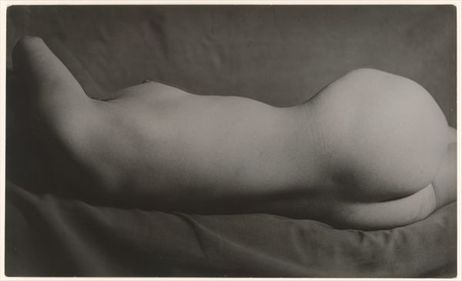 Brassaï 1931-1934 Nude In my opinion, this image is an example of a Punctum image. This is a gelatin silver print photograph created by Brassaï, a French photographer between the years of 1931-34. The image was given the title of Nude. Brassaï was well known for his images documenting 1920's Parisian life. He photographed scenes such as prostitution and city life. This image acted as a Punctum to me as it is not something that I see often as a student photographer. This image strikes me as it is quite graphic as the model is completely naked, in a vulnerable state. This image speaks to me, as body confidence is a difficult thing to have, so to see a model completely naked is quite inspiring. It interests me the way her face has been hidden/cropped to conceal her identity. The whole image is very natural looking with the use of soft lighting and a minimalist setting, which fits in with the idea of vulnerability. This is where I see the Punctum. However, someone else looking at this image may just see the Studium, they may just see it as a simple body without meaning or a message to portray. Others may not feel anything towards this image. I can understand how this image may be too simplistic and plain in peoples eyes. The Studium in this image would be the blanket, and the woman and the way the image has been cropped. However, to me, I really see how this image can show vulnerability and beauty. I saw this image in the Tate Modern in London. It stood out to me over other images as the work around it was more abstract and less pictures of people. Although this image is still abstract due to how the body is positioned, it is still clear what the image is of. In conclusion, I believe that Barthes theory on Studium and Punctum categories helps us to annotate images further and discover the photographers true intentions with a photograph. You are able to understand whether or not a photograph has made you feel anything different, or whether it is just something you like/dislike. Retouching
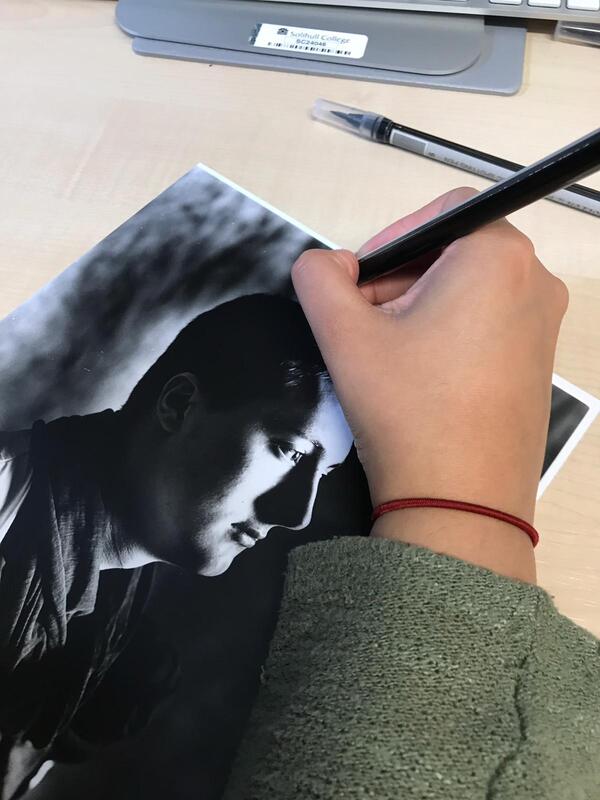
Retouching is a way to perfect your prints by eliminating any dust marks or scratches which may have caused white specks on your print. The process is very simple to do. You simply use some SpotPen’s to paint/draw over any marks you have. The print must be dry when you do this. They come in different shades, so you pick whatever shade matches the area you are covering. Usually the spots you are covering are very small so you just need to be very light-handed with the pens. I chose to use an older print that I had which had a lot of small white dots on it caused by dust either on my negative or on the enlarger lens. I used a between shades 5 and 7 to cover these marks. As you can see, there is a slight, subtle change between the images. However, I found that the pens do not have a good opacity and are quite thin/watery. Therefore, I often had to wait for it to dry and do another layer. I can see the benefit of using these pens as they can perfect your prints and remove any marks. However, in my opinion, they do not completely get rid of them. I would use the pens in future to remove any slight marks. Lumen Printing
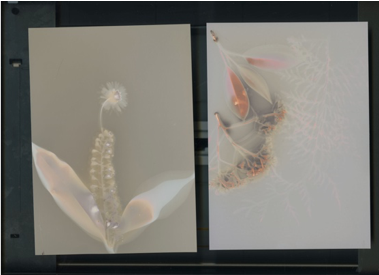
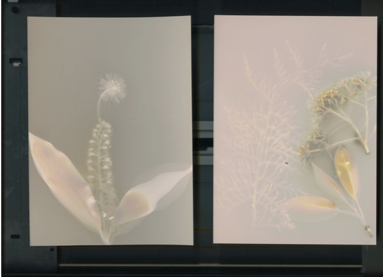
Lumen is known to be the projection of light given out by a particular light source. This could be sunlight or UV light. This way of printing is very useful as you are making use of any available light instead of having to create it using something like an enlarger. This way of printing uses less equipment and it doesn’t cost much to achieve compared to the standard way of printing with an enlarger. Although this is a black and white process, it is known to create different colour tones in the process, which is fascinating to see. Depending on what material you use, the lumen will have a very different effect. To use something wet or damp could react with the paper to create a reaction which spreads out across the paper. It is also interesting to use objects with different opacities and densities. Plants are one of the best to show small details as you can see all the small veins and lines across them.
You can either use expired photographic paper, or just normal photographic paper which has been exposed to light. You can then pick any object to display on the page. You then leave the paper and object in sunlight for 2-6 hours and you can see the paper changing every so often. If you expose the paper to UV light, it does speed up the process. I also tested out Lumen printing myself which I got successful outcomes for. I used both normal photographic paper which had been exposed to light, and I also used expired paper. This was to see the different effects the paper alone can create. I then placed a few things like leaves and plants on the paper and then put it in a photo frame to keep the leaves flat and stable behind glass. I tried to compose my objects in a way that you would be able to see small details and different textures. Overall, I would use this technique again as it was quite simple to achieve and you can use a variety of different objects to create different effects. It does not require very much manual labour as it does most of the work itself. I like the distorted halo effect that this technique makes. It is also very interesting to keep checking on the paper to see how it slowly changes. This is something I would be interested to use again.
1 Comment
|
About me
I am currently undergoing a Creative Arts & Design Practise (Top-Up) course. This blog contains tutorials and advice when creating digital images and editing using Photoshop. Archives
April 2021
Categories |
 RSS Feed
